Umeboshi Without a Weight, and How to Make the Brine Rise
Every umeboshi recipe I can find in English agrees on one thing: you press the plums under a weight equal to their own mass. And if the brine is slow to rise, the standard advice is to add more weight.
I have never used a weight. Not once, in ten years.
What follows is ten days in a glass jar — the part recipes skip between “layer with salt” and “dry them in July” — and the one change that turned a nervous first attempt into a batch I could make at a lower salt level without worrying.
Why there are no photographs of this part
Umeboshi is traditionally made in a crock or a pickling tub. You put the plums in, you put a plate on them, you put a stone on the plate, and you close the lid. Then you wait.
You cannot see into any of that. Which is why every umeboshi article in English jumps from the first day to the drying in July: there was nothing to photograph in between.
A glass jar solves that, and it also removes the weight, because the thing a weight is really for is contact — making sure salt and liquid reach every part of every plum. A jar you can turn over does the same job with your hands instead of a stone.
Day 0 — buying, and going straight home
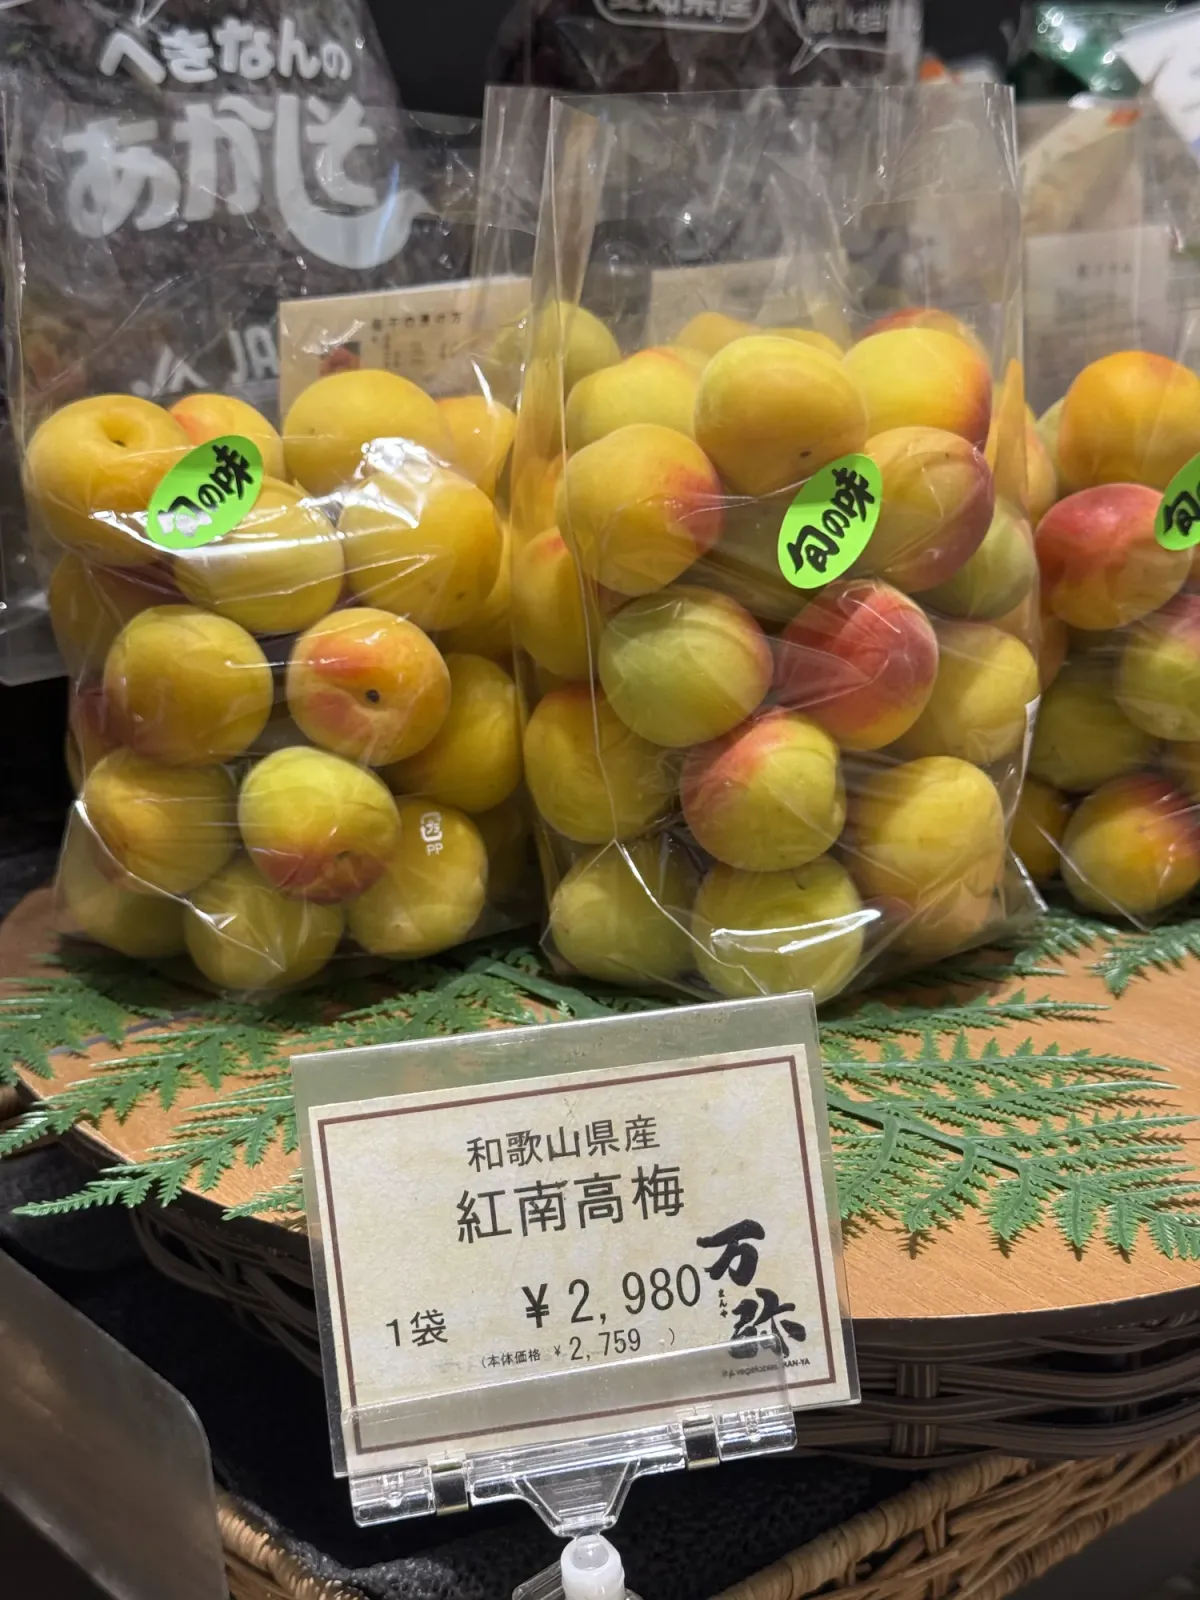
Umeboshi wants the opposite fruit from umeshu. Liqueur needs hard green plums; this needs them ripe — yellow going to orange, fragrant, with a little give under the thumb. Nanko-ume from Wakayama is what most people reach for, because the flesh is thick and the skin thin enough to go soft rather than leathery.
I buy them already ripe and pickle them the same day. Plenty of guides tell you to buy green and ripen them on the counter for a few days, and that works, but it adds a window in which fruit can bruise or go over. If the shop has ripe ones, take them home and start.
Day 1 — salt, and the thing I now do first
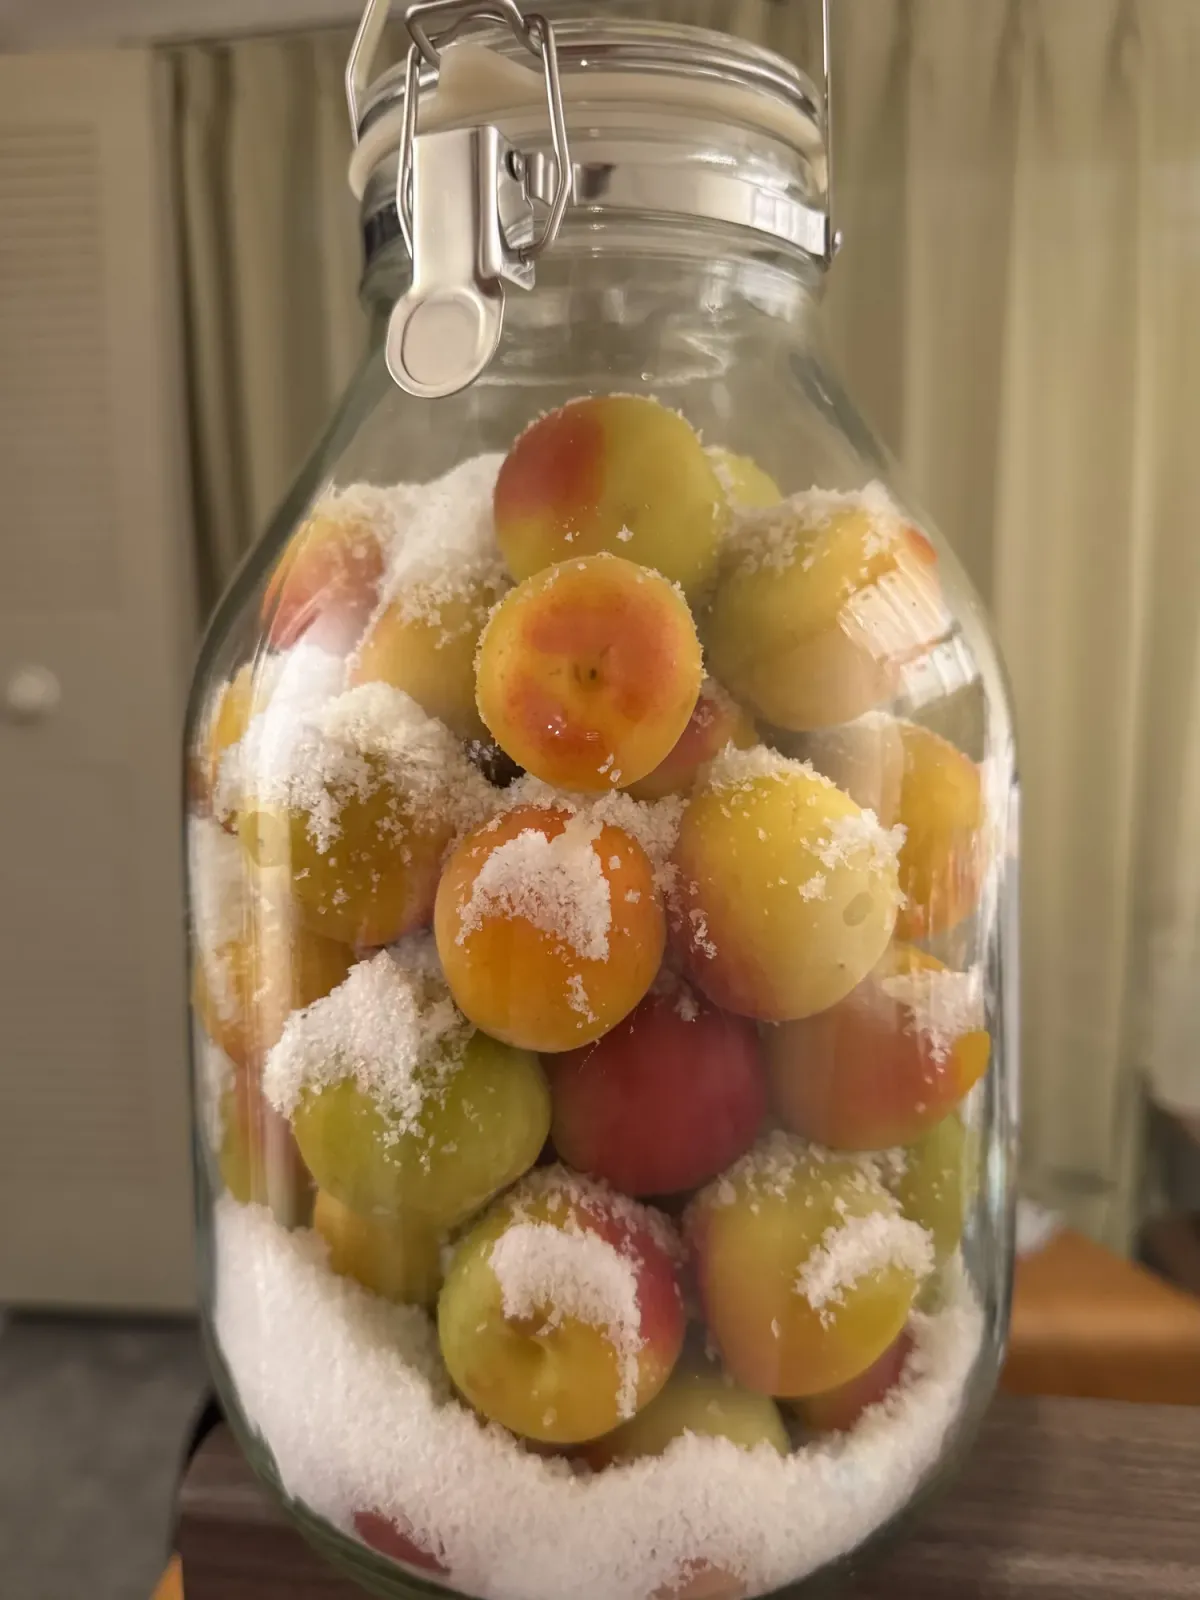
Plums and salt, in layers, finishing with salt. That is the whole recipe, and everything interesting happens after it.
The priming step
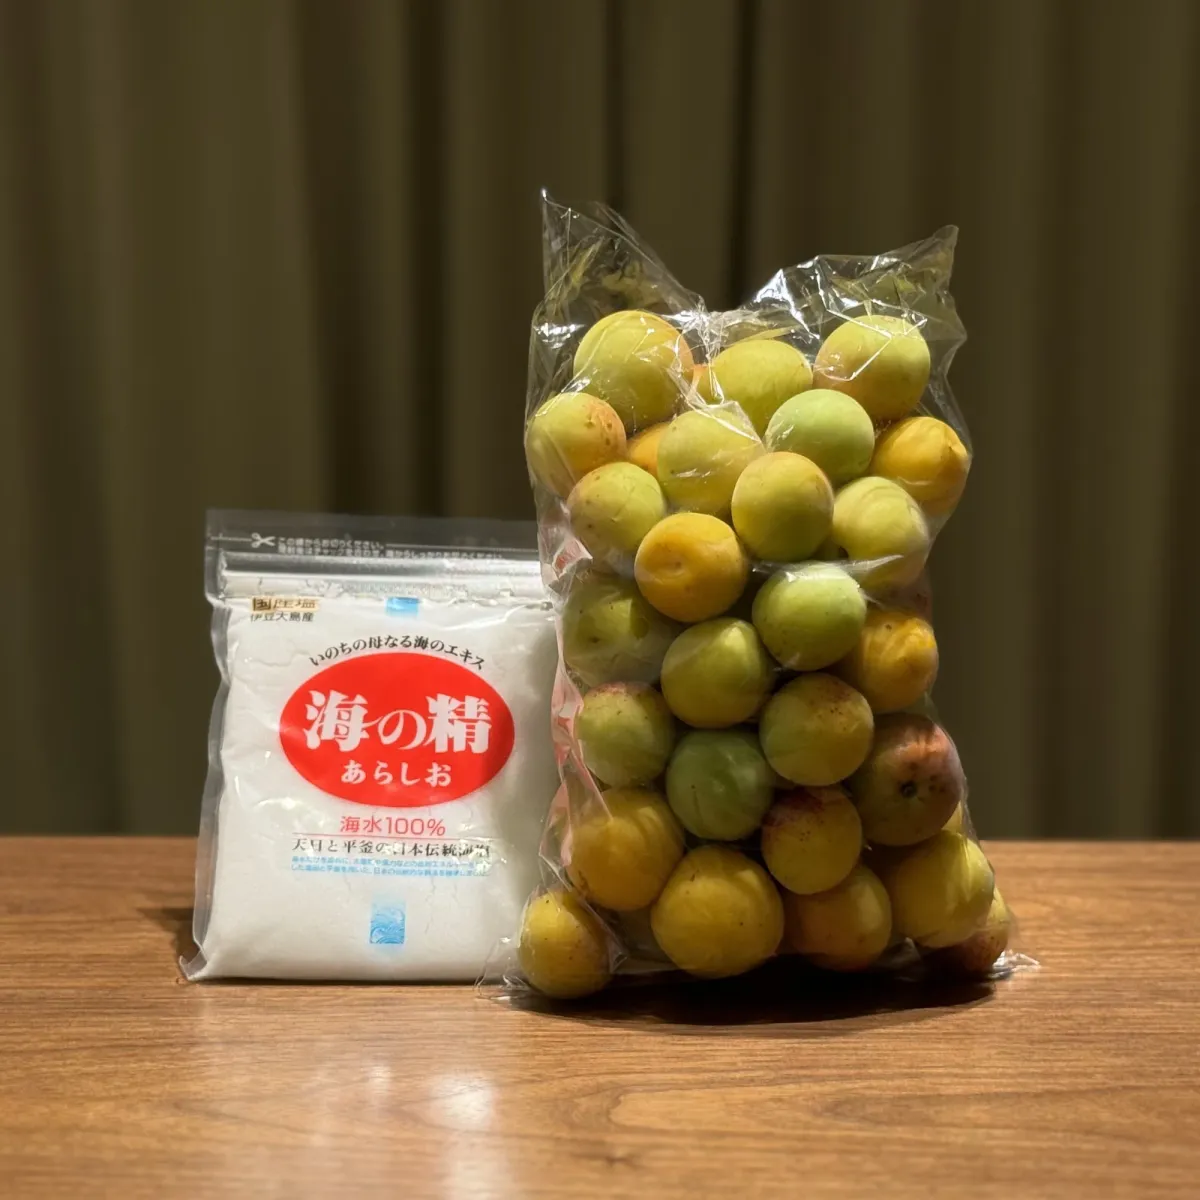
Before any of the plums go into the jar, I now mist each one with umezu saved from a previous year — the salty, sour brine that came out of the last batch — using a small spray bottle.
Priming a batch with old umezu is not something I invented; it turns up in Japanese guides as a fix for a jar that is being slow. But those guides say to pour some in, and pouring puts liquid in the bottom of the jar where it does not touch the fruit that needs help. Misting puts a film of salt and acid on the surface of every plum at once, which is where the extraction actually starts.
The difference was not subtle. The first year the brine took its time and I spent a week watching it. The second year it came up quickly and evenly, and nothing bruised.
If you have never made umeboshi, you will not have any umezu to prime with. That is fine — the first batch is the one that makes the ingredient for every batch after it.
If you would rather not wait a year, umezu is sold as a condiment in its own right, usually labelled ume plum vinegar. Mume Farm in Orland, California grows ume and makes its own, and Eden Foods sells a widely available bottled version. Either will prime a jar. Just check the label for added vinegar — you want the plain brine.
About the salt percentage
Make your first batch at 18%. That is 180 g of salt per kilo of fruit, it is the standard figure in Japan, and it is standard because it is forgiving. Below roughly 15% you are into territory where mould is a real possibility rather than a theoretical one.
My first batch was 18%. My second was 15%, with the priming, and it came out clean.
I am deliberately not telling you to start at 15%. The lower number worked because the brine rose fast enough to submerge the fruit before anything could go wrong, and it rose fast because of the umezu and the turning. Take the margin the first time. Spend it later, once you know what a jar looks like when it is behaving.
Day 2 — when it looks like nothing is happening
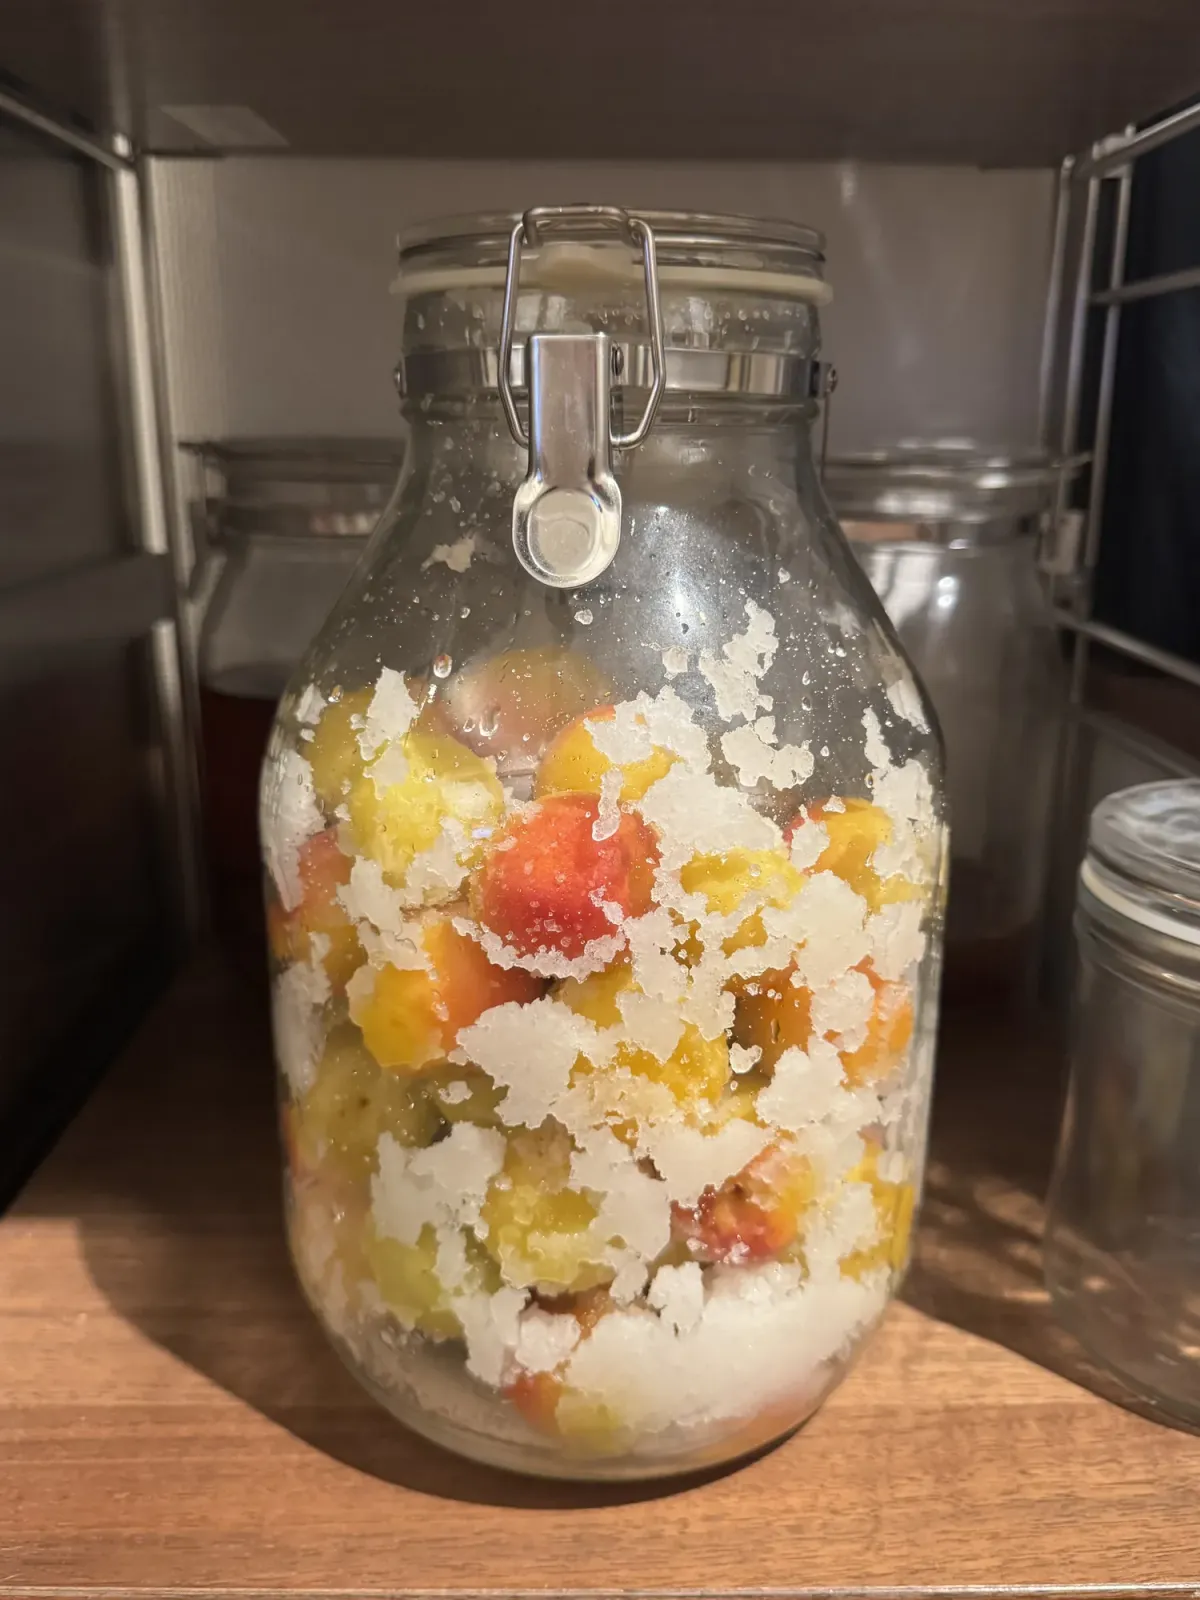
This is the stage that generates the panicked searches. The salt has clumped and slid down between the fruit, nothing is pooling, and the internet is telling you to add weight.
It is working. Salt has to draw water out through skin, and that takes days.
What I do instead of adding weight: I turn the whole jar upside down, morning and night. Lid on tight, invert it, leave it. Next time, invert it back. That is it. Every plum takes a turn at the bottom, and the salt and the first of the liquid get moved over all of them instead of settling.
That twice-a-day turning is the entire substitute for a stone, and it is also what saved the first batch when the brine was slow.
Day 4 — colour
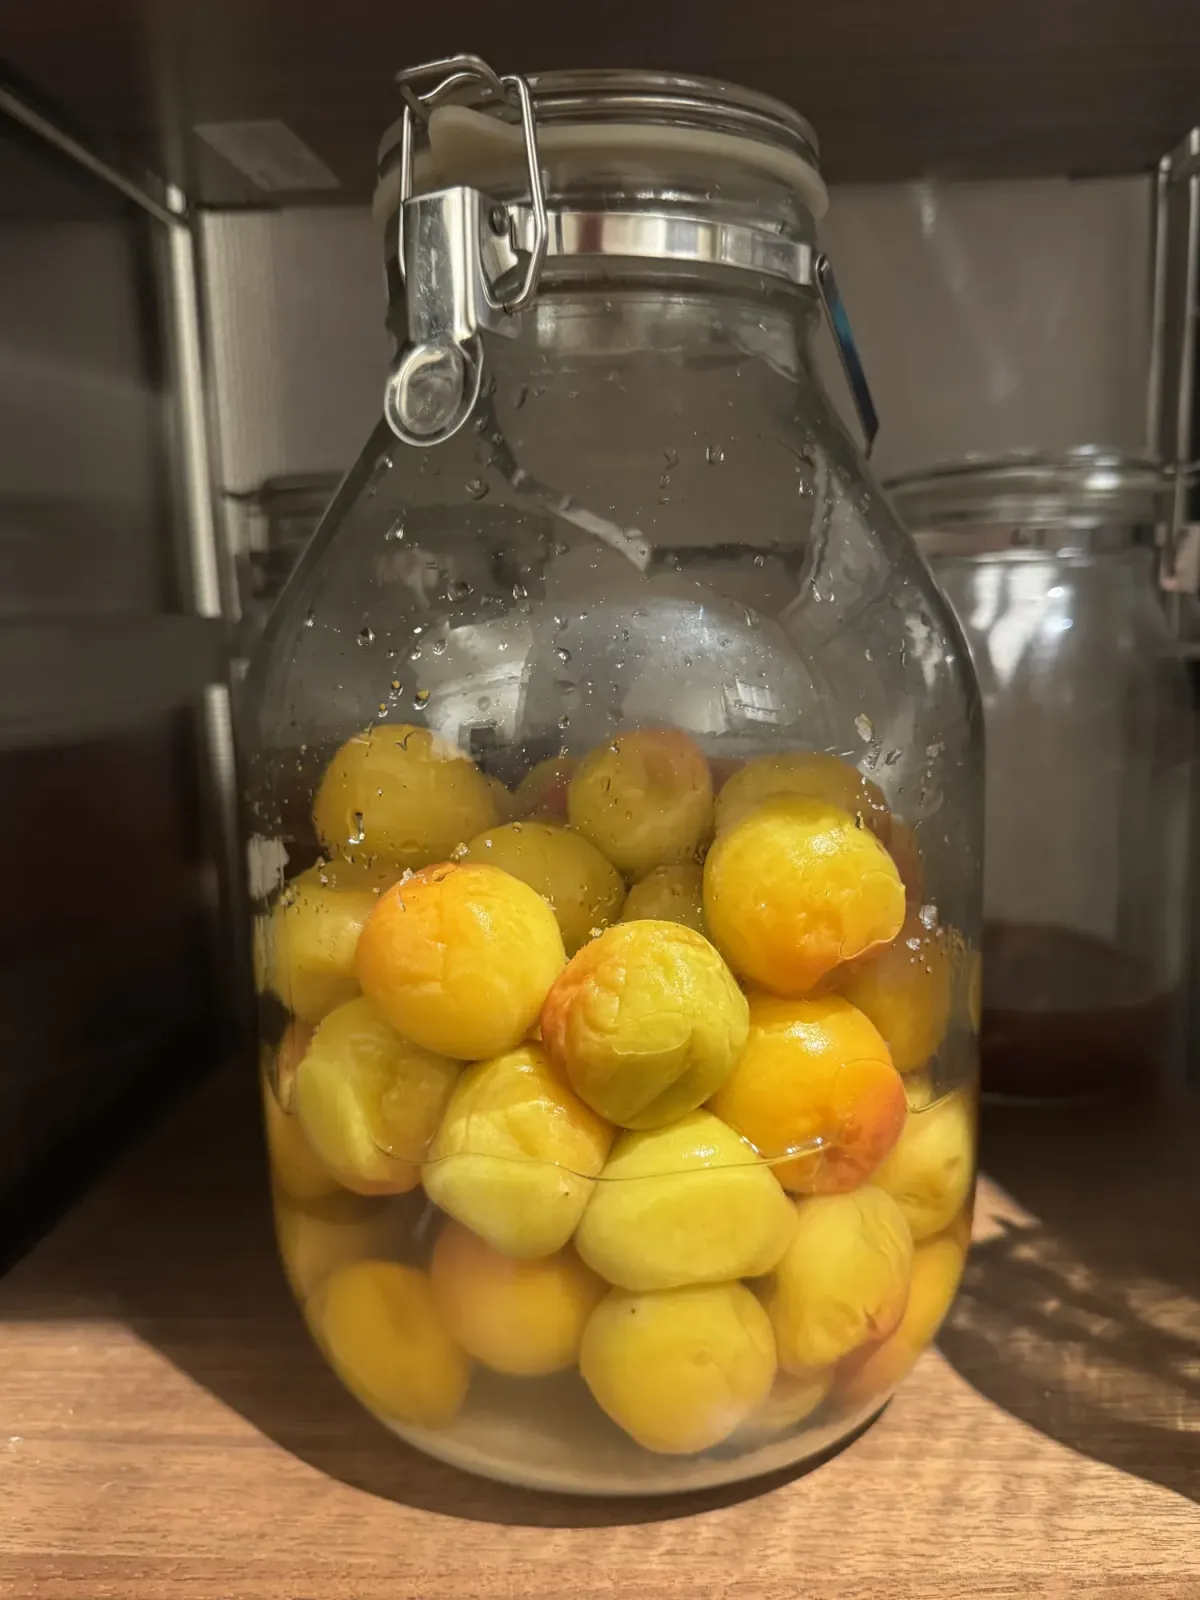
The colour change is the first honest sign of progress. Pale yellow with a green cast becomes orange-yellow. The salt crust is gone.
Tilt the jar now and there should be liquid moving. Not much. Enough to hear.
Day 10 — under the brine, and hands off
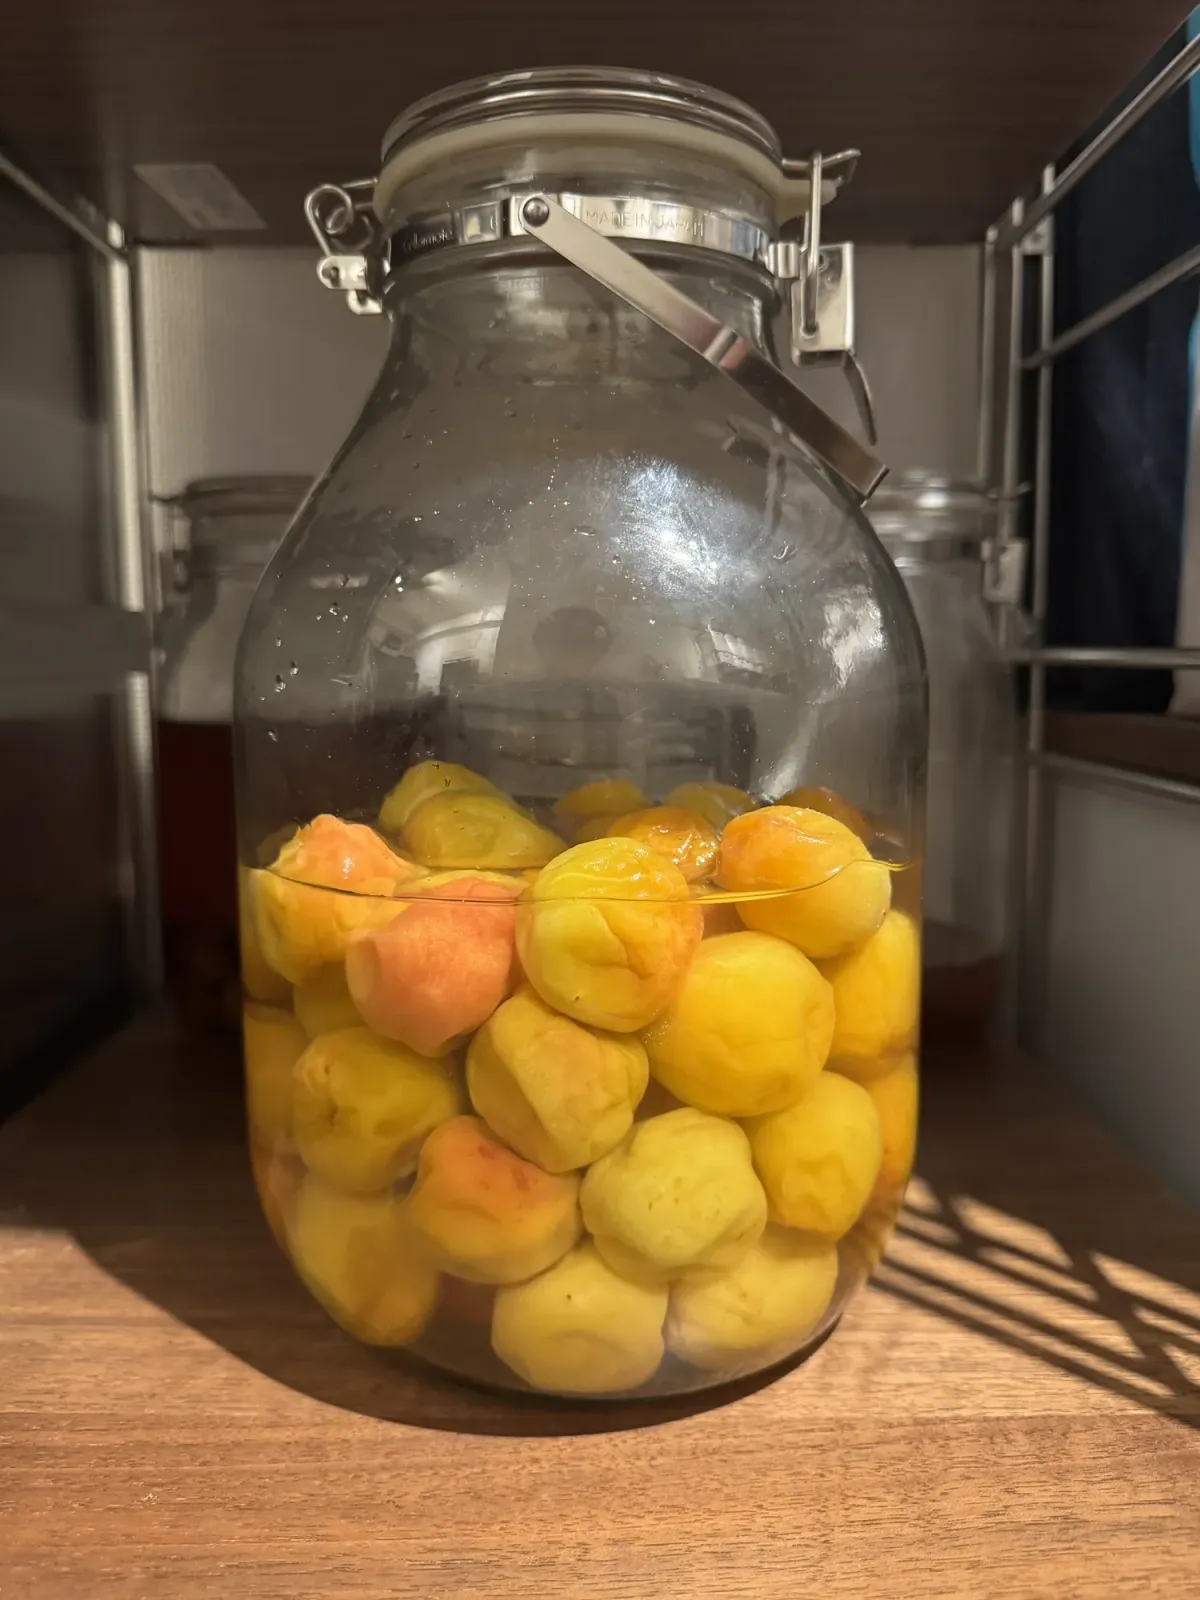
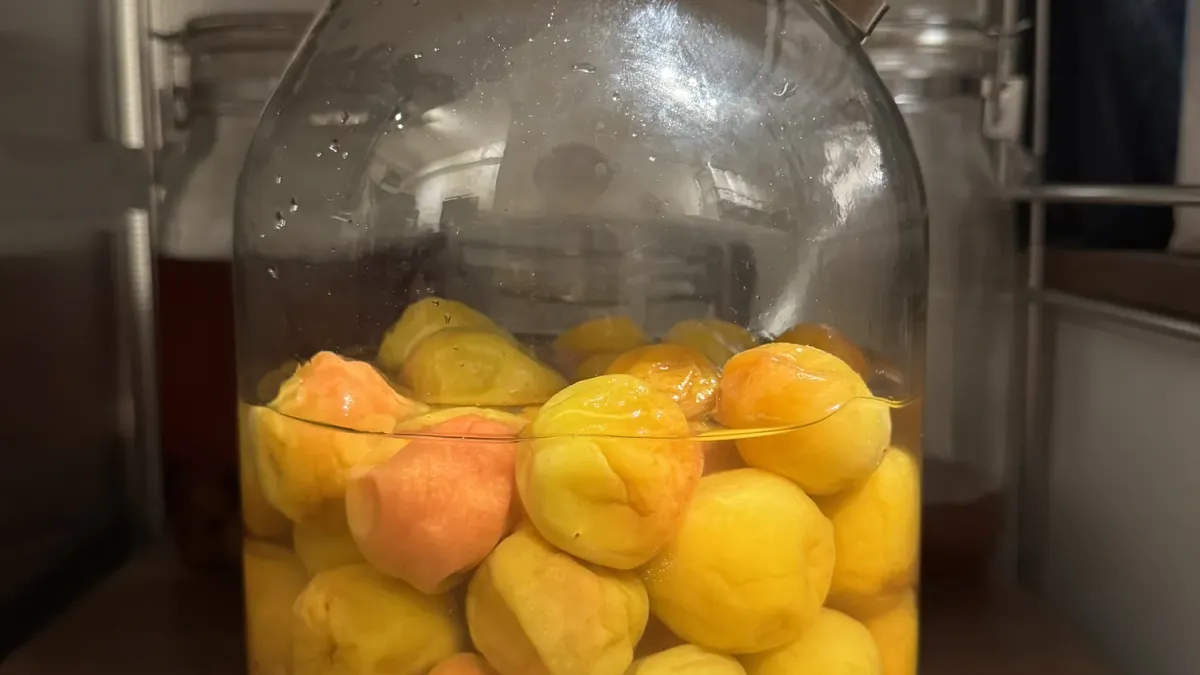
This is the picture I wanted someone to show me the first time.
The fruit is floating in clear umezu that was not added — it was pulled out of the plums by salt alone. The jar has gone from dry crystals to a brine deep enough to cover everything.
Once the plums are submerged, I stop. No more turning, no checking, nothing. The jar goes somewhere dark and cool and stays there until the rainy season ends. The brine is the safety mechanism, and the moment it covers the fruit, the anxious part of umeboshi is over.
If your brine still is not rising
In order of how likely they are: not enough salt; fruit that was too green and firm to give up water; or a jar wide enough that liquid spreads across the bottom instead of pooling up the sides. A tall narrow jar helps more than it sounds like it should.
Turn it twice a day and give it the full ten days before you decide something is wrong. Most jars that look stuck on day four are fine on day eight.
July — the drying
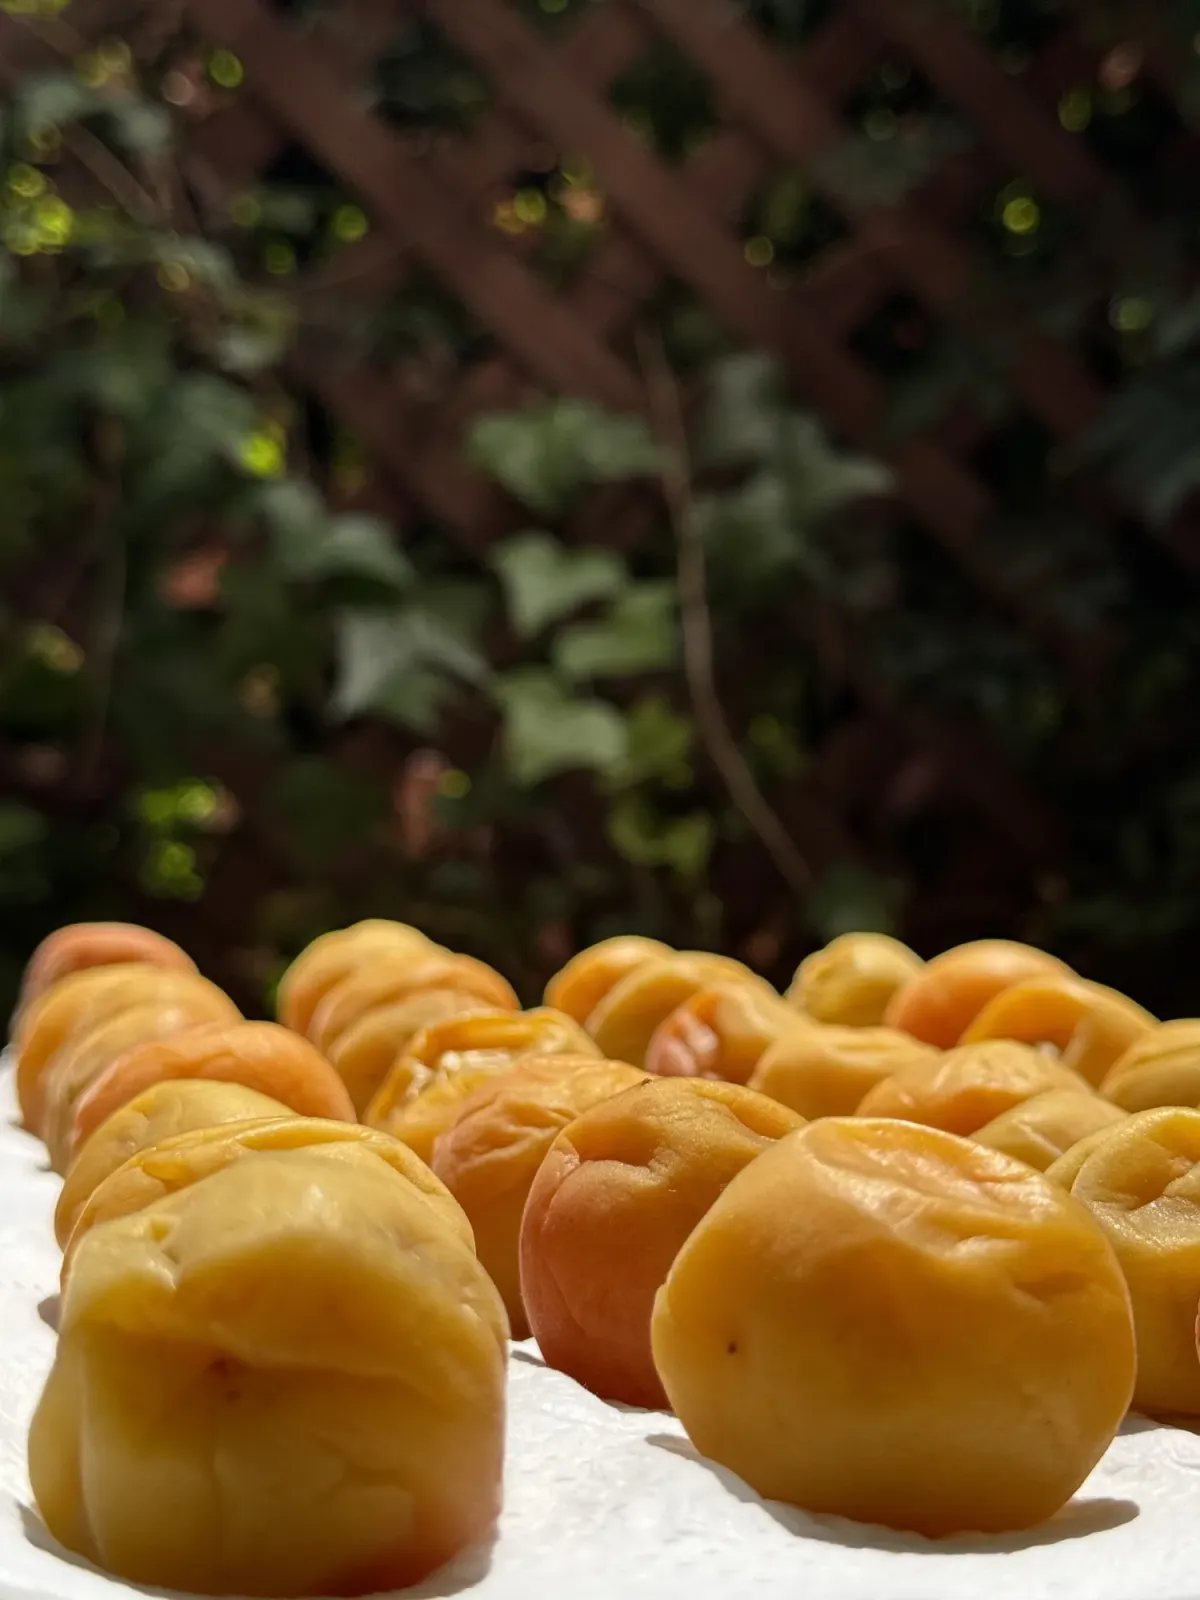
This part is well covered elsewhere in English, so I will be brief.
Doyō-boshi is timed to the hottest stretch of the Japanese summer, traditionally around 20–23 July, because that is when the sun is strongest and mould least likely. Three days and three nights, turned once a day so both sides get equal sun. The skins pucker, the flesh firms, and the colour deepens.
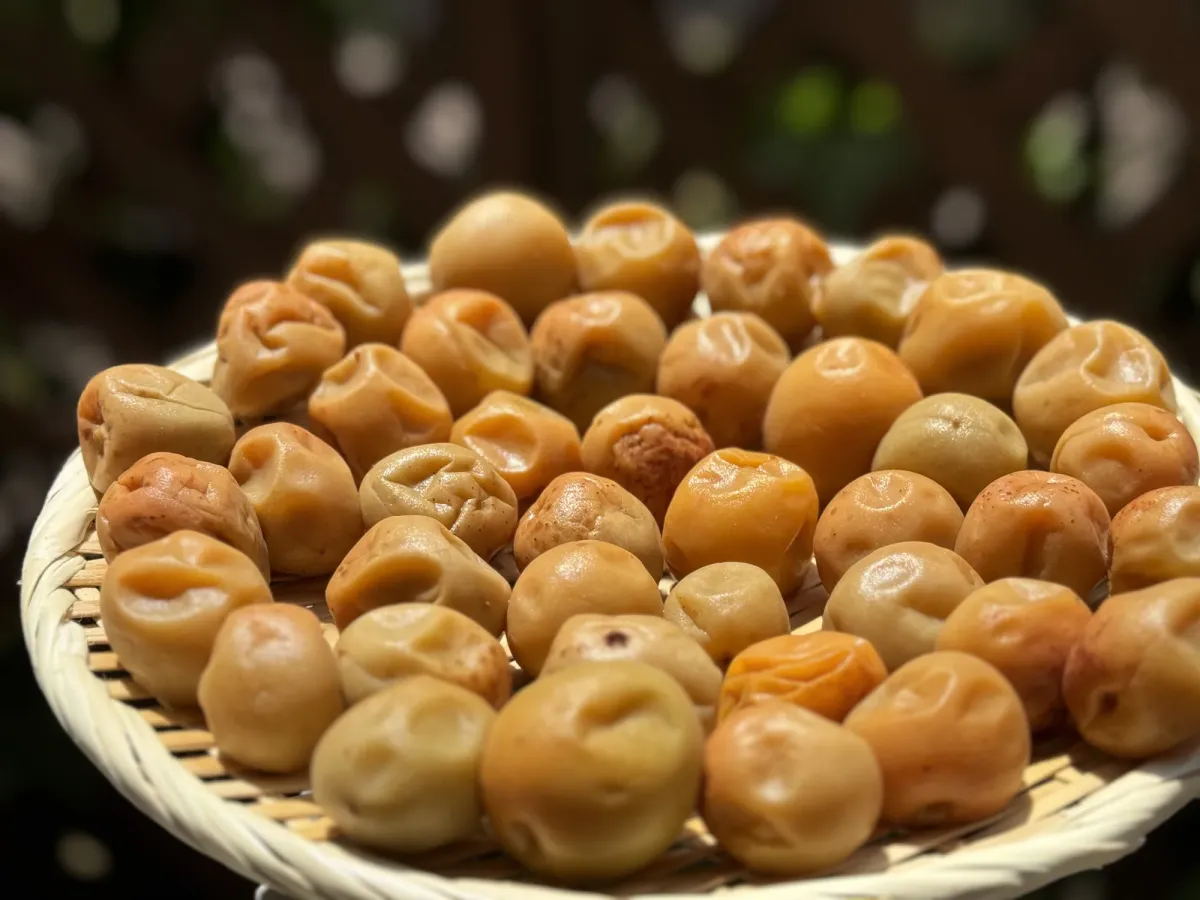
I do not put them back in the brine
Here recipes diverge, and it is worth knowing that it is a choice rather than a rule. Many people return the dried plums to their umezu, which keeps them wetter and softer.
I do not. Mine go straight into a ceramic jar, dry, and stay there. They firm up and concentrate, and the umezu gets kept separately — it is a good ingredient in its own right, and it is what primes next year’s batch.
That last part is the loop that makes this worth doing every June. One jar of umeboshi produces the thing that makes the next jar easier.
Related
- Umeshu made with dark rum — the same fruit three weeks earlier, in alcohol instead of salt